
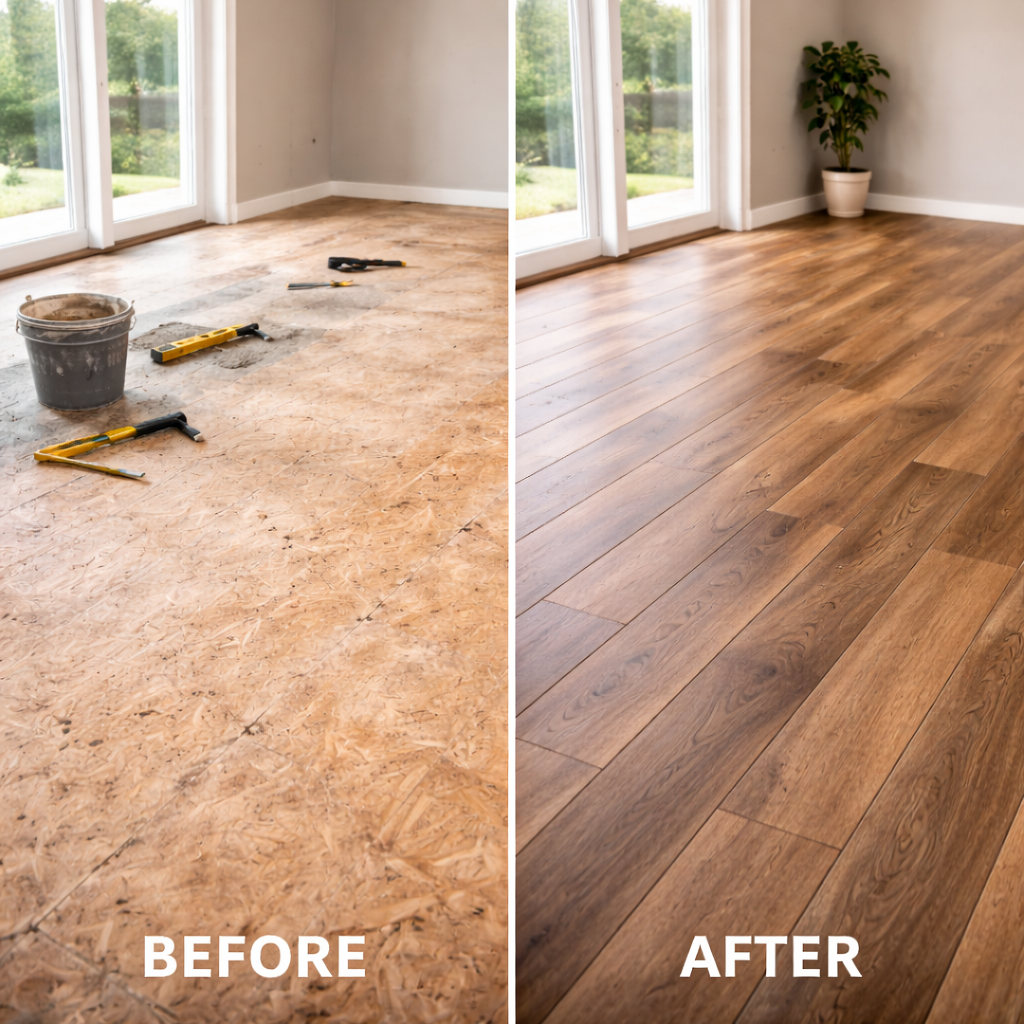
A floor is only as good as what's underneath it. Too many flooring jobs fail because installers skip subfloor prep, don't test for moisture, or cut corners on transitions. We start with the foundation—literally.
Whether it's hardwood, LVP, tile, or concrete, we prep the subfloor, test for moisture, level where needed, and install to manufacturer spec. Then we handle transitions, baseboards, and sealing. The floor you walk on is built on solid work underneath.
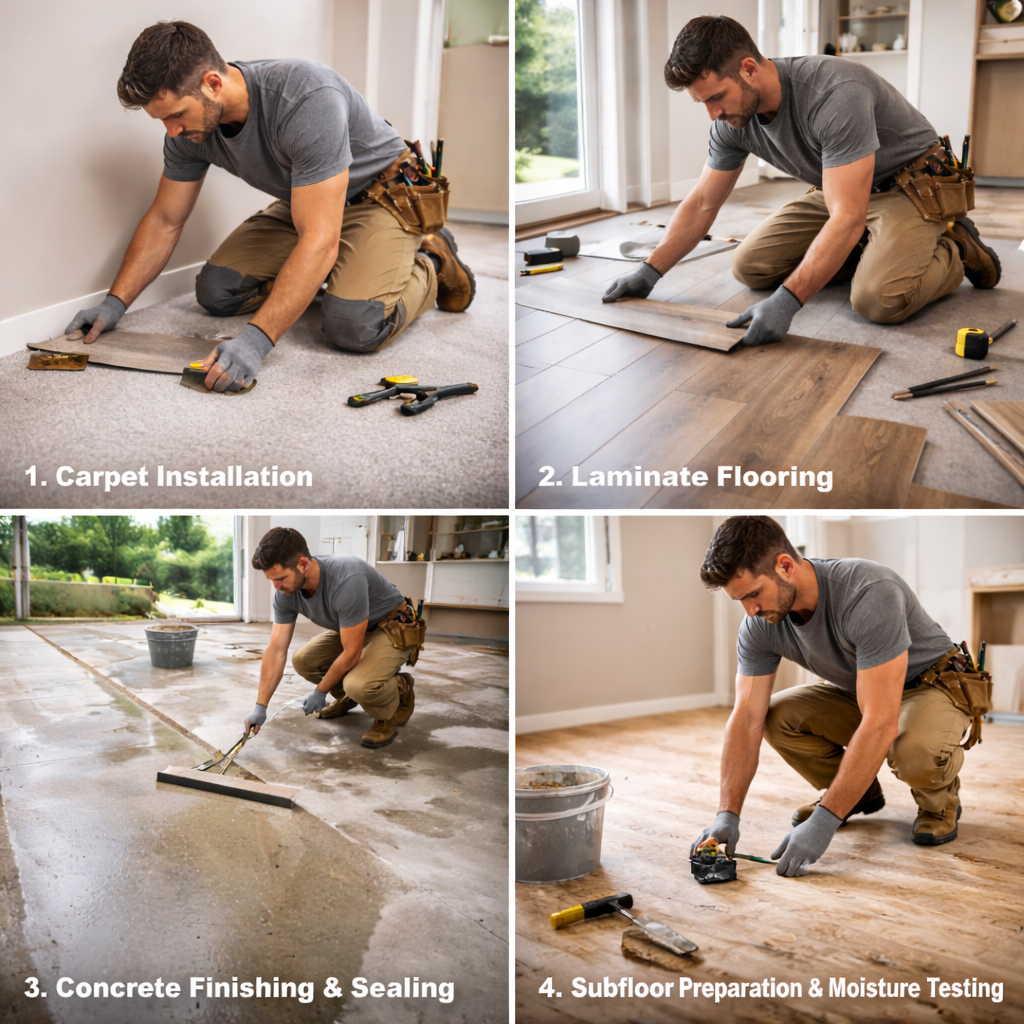
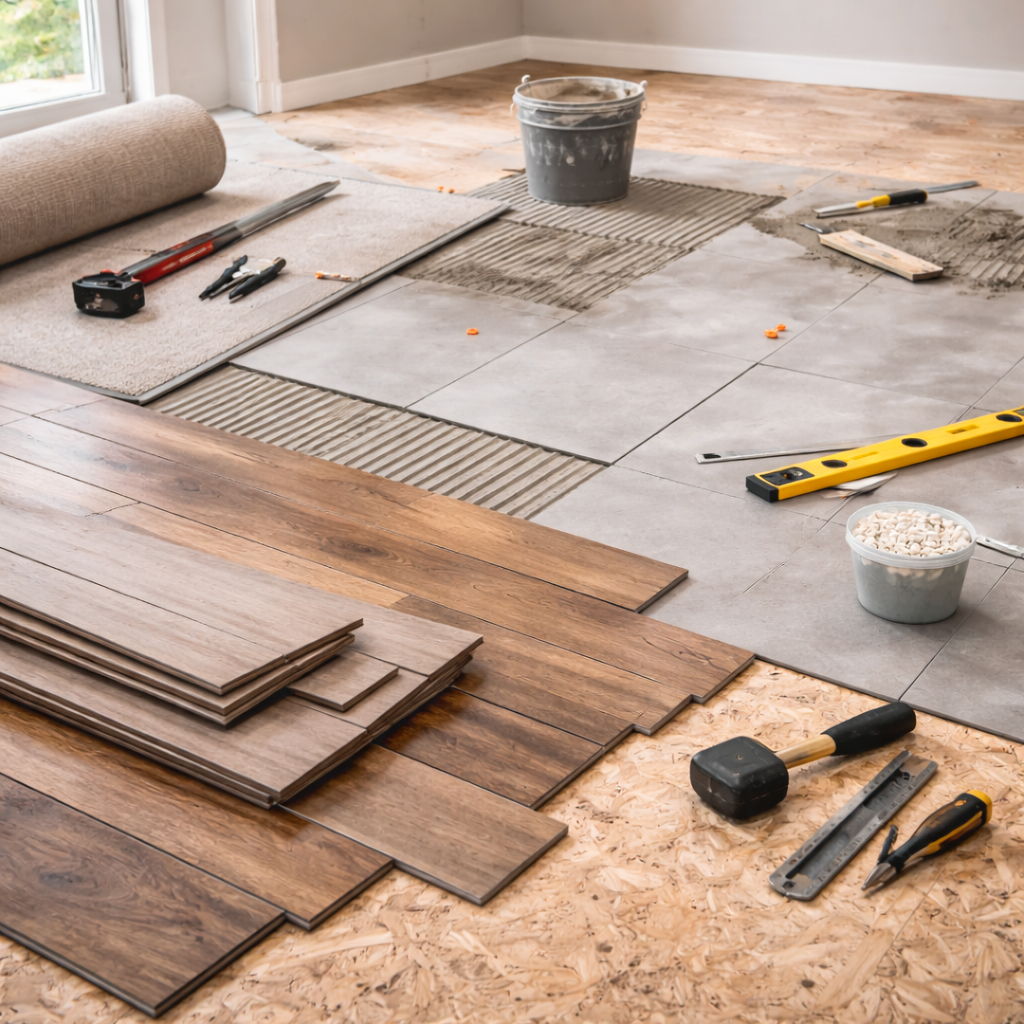
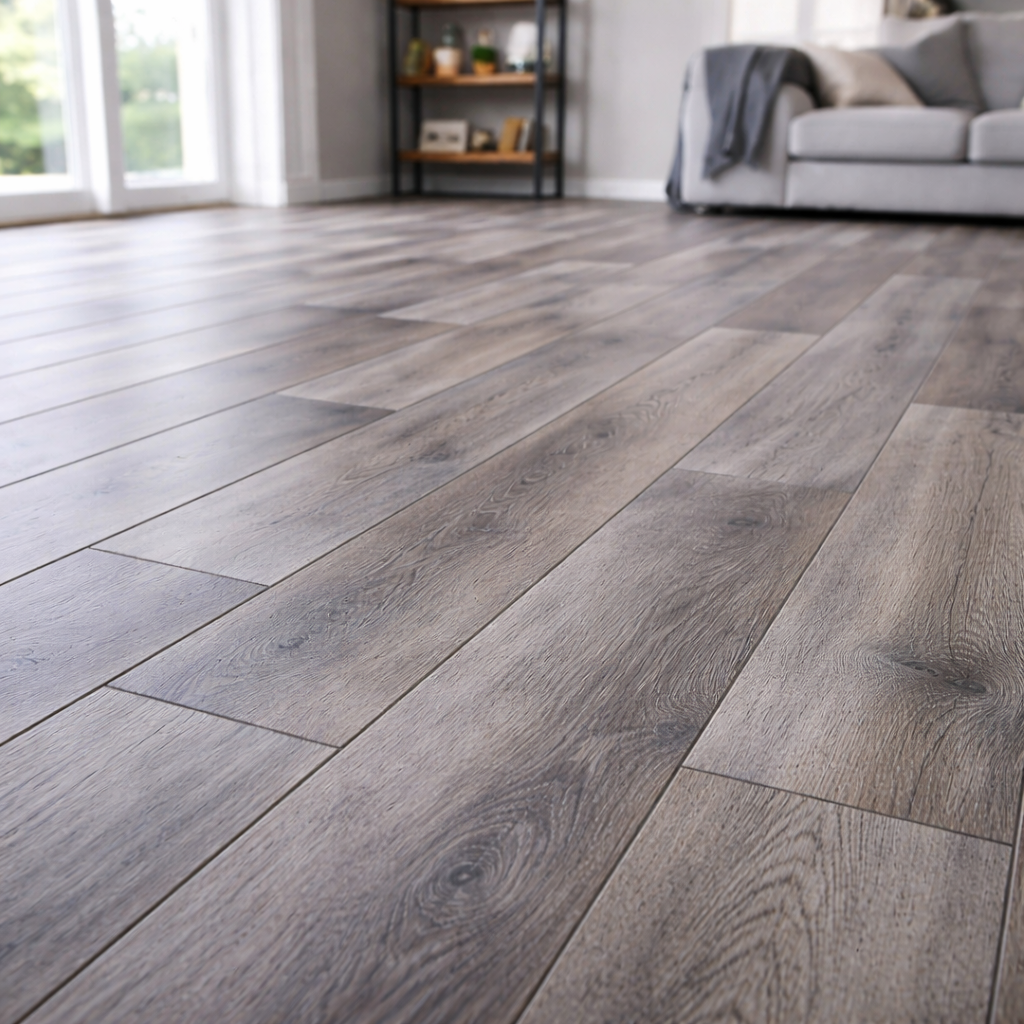
LVP is the workhorse of modern flooring. It mimics wood grain (sometimes convincingly), is waterproof, warm underfoot, and durable. Installation is fast and requires less intensive prep than hardwood. Subfloor preparation is still critical. We level the subfloor (LVP doesn't hide bumps as well as carpet), test for moisture, and apply underlayment where needed. A properly prepped subfloor = a floor that stays flat and doesn't telegraph imperfections. Moisture testing: if the concrete subfloor shows moisture, we install a moisture barrier or recommend a higher-quality underlayment. Vinyl can trap moisture—we don't let that happen. Click-and-lock installation is common, but glue-down is sometimes required (like in kitchens or high-moisture areas). We install to spec, including acclimation time and proper spacing for expansion. Transitions between rooms: LVP to tile, LVP to carpet, LVP to concrete. We use metal, vinyl, or wood trim designed for the floor types involved. Transitions look clean and perform well. LVT (tile format) is installed the same way but gives you a tile look. Grout lines aren't necessary—the planks lock. Works great in kitchens and baths.
Laminate is a budget-friendly option: a printed design layer over a plywood core, topped with a protective wear layer. It's durable, easy to clean, and looks like wood or tile without the cost. Installation is float-system: planks click together and 'float' on the subfloor without nails. This means no fastening required and easier replacement if a plank is damaged. The trade-off is that laminate can move slightly underfoot if the subfloor is uneven. Subfloor prep: still critical. Level the subfloor, test for moisture, and install underlayment (laminate doesn't handle moisture well). Moisture barriers are essential in basements and kitchens. Acclimation: like hardwood, laminate needs time to adjust to local humidity. Denver's dry air means laminate can shrink slightly—we acclimate for a few days. Click-together installation is straightforward but precision-dependent. Angles matter. We stagger end joints and ensure tight, gap-free planks. Water and laminate: laminate is not waterproof. Kitchens and bathrooms require careful sealing at transitions and around fixtures. A spill that pools will damage laminate—we design installation to shed water quickly.
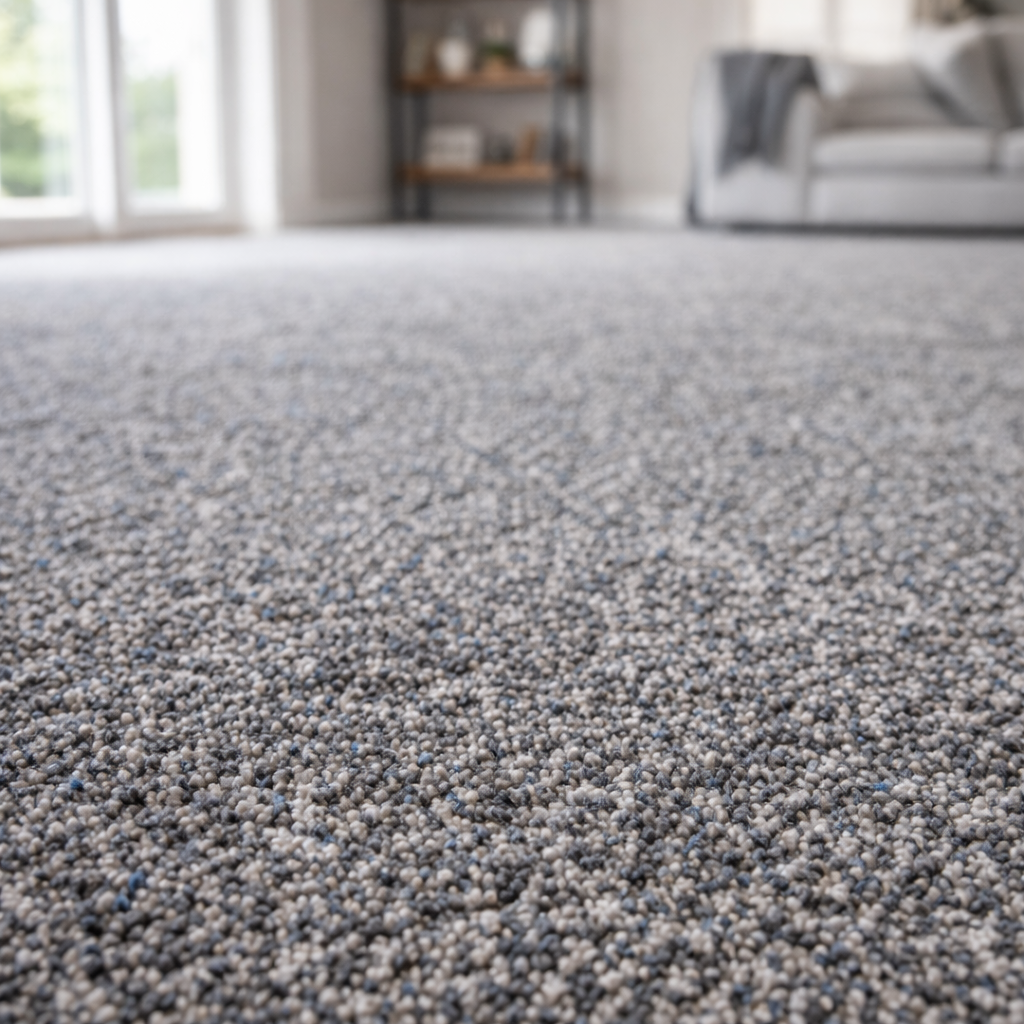
Carpet feels good and insulates against cold (important in Colorado basements). Installation requires precision: proper seaming, tucking at edges, and power-stretching to prevent wrinkles. Subfloor and underlayment: carpet needs a clean, dry subfloor. We test for moisture—a wet subfloor will ruin carpet. Underlayment adds cushion, insulation, and sound absorption. Seaming: if your room is wider than carpet roll width (typically 12 feet), we seam two pieces together. Seaming must be straight, tight, and done before the floor is installed. Power stretching: quality carpet installation requires power stretching to remove wrinkles and ensure the carpet sits flat. Without stretching, you get lumps and ripples within months. Transitions: carpet to hard flooring transitions use trim that's both functional and finished-looking. Moisture concerns: basements in Colorado can trap moisture under carpet. We address this with vapor barriers and moisture-resistant underlayment. Test before install.
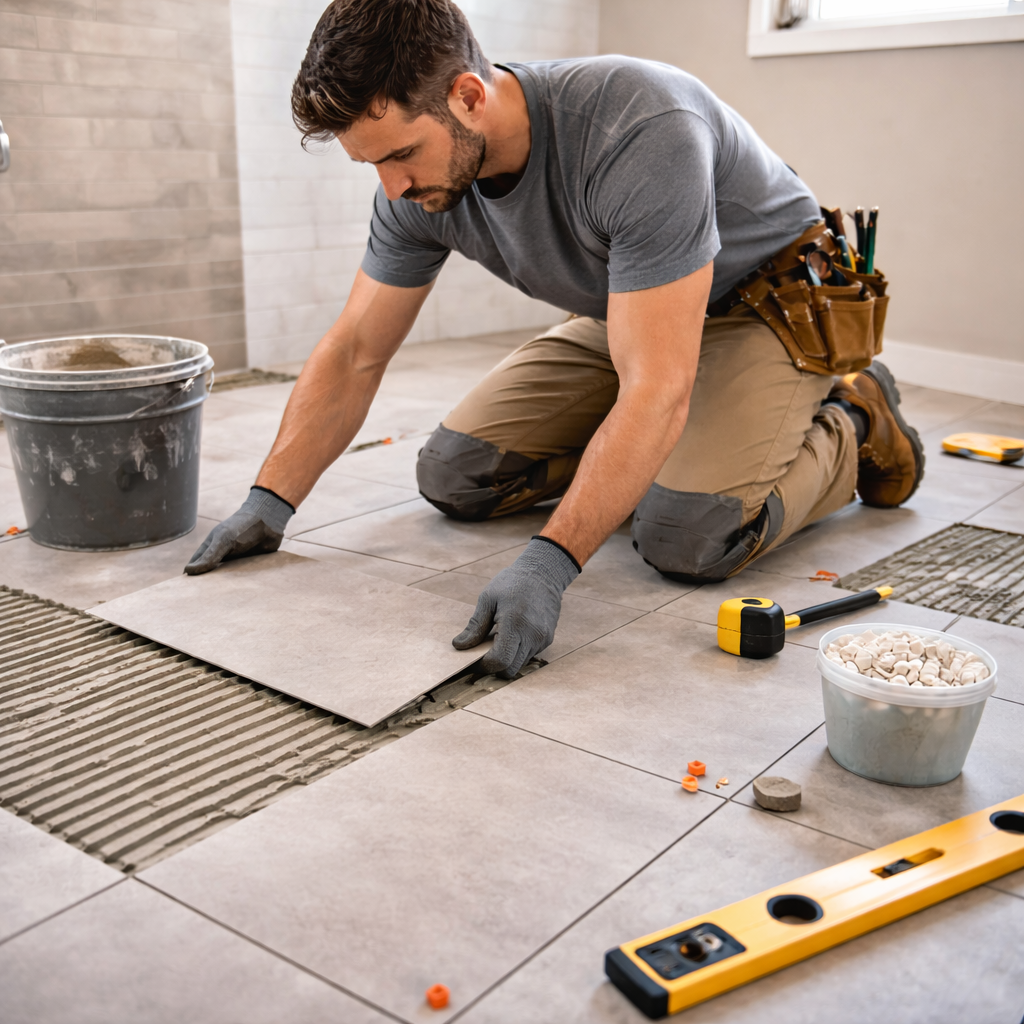
Ceramic, porcelain, and natural stone tile all start with the same foundation: a properly prepared, level subfloor and moisture management. Subfloor prep for tile: concrete must be clean, level, and stable. We remove old flooring, repair cracks, and level where needed. If moisture is present, we install a waterproofing membrane (critical in bathrooms and kitchens). Layout matters. We dry-lay the tile first to minimize cuts and ensure grout lines are balanced and symmetrical. Small adjustments in layout now prevent awkward partial tiles at walls. Setting tile: we use modified thin-set mortar (never old-school sand-cement). Thin-set adheres better and cures faster. We comb at the right angle (45 degrees) to get consistent coverage underneath the tile. No voids = no cracks. Grout: epoxy grout for kitchens and bathrooms (more stain-resistant and waterproof), sanded grout elsewhere. We mix grout to the right consistency, press it into joints, and clean excess before it hardens. Sealing: natural stone (slate, limestone, travertine) must be sealed. Porous tile also benefits from sealer, especially in wet areas. We apply sealer to suit the stone and use. Slope and drainage: in bathrooms and showers, tile must slope toward drains (typically 1/4 inch per foot minimum). We get this right to prevent water pooling.

Solid hardwood is 100% wood, moves more with humidity, and can be refinished multiple times. Engineered has a veneer of real wood over plywood—more stable, less movement, fewer refinishing options. Solid is beautiful but demands moisture control. Engineered is more forgiving in Colorado's dry climate.
Yes, always. Moisture under flooring causes cupping, buckling, and mold. We use calcium chloride tests or Tramex meters on concrete subfloors. If moisture is high, we address it before flooring goes down.
Yes, if moisture is controlled. Basements are tricky because clay soil holds water. We install interior French drains, vapor barriers, and moisture barriers. Then we specify a hardwood species that's more stable (like engineered or acclimated solid). It works—we do it—but requires the right approach.
LVP (luxury vinyl plank) is a waterproof, durable, warm-underfoot flooring that mimics wood or tile. It's affordable, easy to install, low-maintenance, and handles spills without damage. Perfect for kitchens, basements, and rental properties. Only downside: it can't be refinished like hardwood.
We use trim designed for the transition: metal T-molding between wood and tile, vinyl or wood for LVP, stone trim for tile-to-concrete. Transitions are both functional (they bridge height differences) and aesthetic. We measure, fit, and install so they look professional.
Tile or LVP. Both are waterproof and handle spills and moisture. Tile is more formal, harder underfoot, but very durable. LVP is warmer, quieter, easier to maintain, and looks great—but can't be refinished if scratched. Both outlast hardwood in a kitchen.
Depends on square footage and type. LVP or laminate over a prepped subfloor: 2–3 days for a 1,500-sq-ft home. Hardwood with sanding and finishing: 2 weeks (including curing). Tile: 4–7 days. We give you a realistic timeline during the estimate.
Yes. Tile, concrete, and LVP work great over radiant systems. Engineered hardwood can work with the right species. Solid hardwood requires caution—species matters. We coordinate with your radiant system installer to ensure compatibility.
Yes, removal is part of the install. We haul off old material. Removal costs depend on the floor type and square footage. We include it in the estimate.
We warranty our installation workmanship for two years—seams in LVP, grout joints in tile, hardwood nailing and finishing. Manufacturer warranties cover the material itself. We stand behind our labor.


I had a few things around the house that needed attention — a leaking kitchen sink, a loose faucet, and a couple of light fixtures that needed to be replaced. The handyman showed up on time, worked efficiently, and explained everything he was doing. Everything works perfectly now and the price was very reasonable. I’ll definitely call again for future projects.

We hired them to mount a large TV above our fireplace and install some shelving in the living room. The installation looks fantastic and everything is perfectly level and secure. He was very professional, clean, and clearly knew what he was doing. It’s hard to find reliable help these days, but this company is the real deal.

Our toilet started constantly running and I couldn’t figure out what was wrong. The handyman came out the same day, diagnosed the issue quickly, and replaced the parts inside the tank. The repair was fast and now it works like new. Super friendly service and very knowledgeable.

We had several small projects piling up around the house — a towel rack that came loose, a cabinet door that wouldn’t close properly, and a bathroom fixture that needed to be replaced. Instead of calling multiple companies, we had them handle everything in one visit. The work was high quality and done much faster than we expected.

Excellent experience from start to finish. They installed a new kitchen faucet, fixed a slow draining sink, and even helped adjust a door that had been sticking for months. Everything was done professionally and the workspace was left spotless. It’s great knowing we now have a dependable handyman to call.